Sunday, August 19, 2007

Geek Modified Media Cabinent

I am a geek. I have years worth of CDs and DVDs saved up that I burned myself or that I received in paper envelopes with computer hardware. Yes, much of the software is Linux distros. All in all, the stack of media with no cases has grown unwieldy, and though the containers that blanks come in work OK, I wanted something a bit more flashy.

And, oh by the way, I do have a lot of CDs and DVDs in my den that do have cases.

So I bought this media cabinet for a couple of dollars at a yard sale:


My idea is to add spindles to hang lots of stored CDs and DVDs on. This isn't good for stuff you use often, but that isn't what I want to store.


Step 1 is to cut some crossbeams to fit into the media center. I used 1x3 lumber. I cut it so it fit snugly into the cabinet. Test fitting it is always a good idea.


Step 2. I placed 2 CDs side by side on the board along the center line along the board and marked the center with a pencil.


Step 3. I drilled out 1/2 inch holes not quite all the way through and put in 1/2 inch dowel rods at a length chosen to not stick out from the media cabinet. Again I test fitted to make sure the piece fit properly. The dowels are glued in with Elmers wood glue.


Step 4. For my heft collection of CDs I wanted a lot of spindles, so I copied the design three more times. All copies were also test fitted. Oh, and everything was sanded, of course.


Step 5. I spray painted all of the holders, once assembled, gloss black so they would blend in with the media cabinet.


Step 6. After the holders were dry, I removed some of the shelves from the media cabinet and inserted the holders where I wanted them, using CDs to verify the spacing. I placed I single screw into each holder through the media center back. This was more than enough to hold them since they fit snug.


Step 7. I added CDs for a cool new look with lots of storage.


Sunday, August 12, 2007

Compound Miter Saw Bench Part 2: Legs and Assembly

In this segment, we build the legs, add the bottom shelf, and assemble the bench.


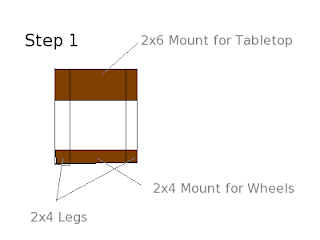
Step 1: build a square out of a 2x6 (top), 2x4 legs, and a 2x4 (bottom), as shown to the right:

Step 2: These legs then get screwed in between the front and back edge of the table top.

The back edge is identical to the front edge with an appropriate notch cut out for the saw overhang.

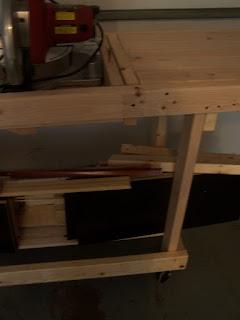
Here is a view of the legs attached to the table top:


Step 3: Two cross beams are attached from the bottom of each legs set to the leg set on the opposite side:


Step 4: Add wheels to the bottom of each leg. I used cast wheels covered in rubber from Harbor Freight.


I added 4 1x3s between the legs across the bottom to form a shelf for stacking wood. The additional weight on the bottom kept my rather narrow bench from being top heavy.

Don't forget to bolt your saw into the saw box per manufacturer's recommendations.


The Finished Product (with some of my short pieces of lumber stacked underneath):


Friday, August 10, 2007

Building a Mobile Compound Miter Saw Bench

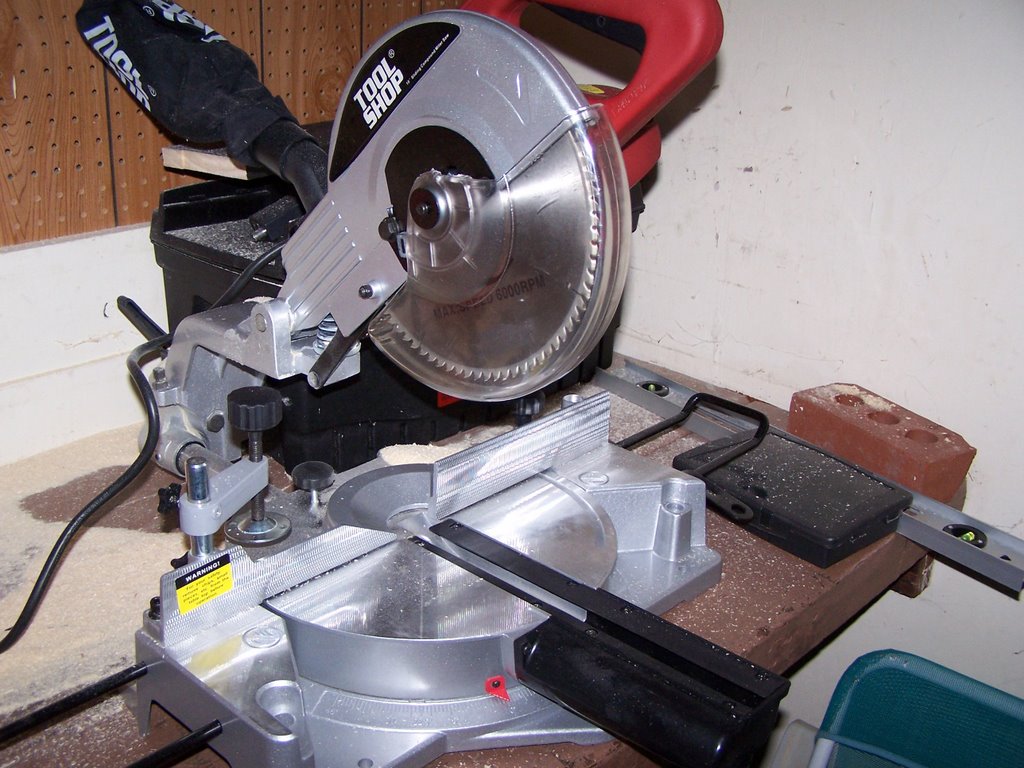
You may remember my saw. Well this spiffy compound miter saw is wonderful to work with, but really needs to be bolted down. My workbench, however, is short and doesn't have room for wood. So, the idea here is to build a workbench for my saw with wheels.

The idea is two simple stages. First, build a table top out of 2x4s to bolt the saw to. The table top shouldn't be flat, because the level surface of the saw is higher than the surface it is bolted to. Instead of having this several inch gap, I would like to have the saw table and the table top within 1/4 inch of each other, with the saw table being slightly higher. Second, the table top needs legs with wheels and a nice setup for storage. It would be nice too, if the base could eventually accommodate dust collection.

This post is going to cover stage one. Stage two: the legs will be covered in a future post.


Building the table top takes 4 major steps. There is some finishing to be done after this that will be included in mounting it to the legs after stage 2.
Step 1, as shown above is to build 3 table segments. Just cut 2x4s to length, match them up side by side, add another 2x4 at a 90 degree angle to screw the 2x4s to, as a cross brace, and viola: a flat surface on side. I used the 4" side of the 2x4s for the table surface. It could be adapted to use the other side, if you really wanted to. Throughout this project I used 2 1/2 inch drywall screws, but a similar size screw of different types would probably work.

The result flat table segments should look like this:

TABLE TOP:


<-- Crossbrace, with screws visible


Step 2, as shown in the diagram, is to add edges to form the saw box. This is the box that the saw will sit in and bolt to. I just literally screwed 2x4s to the appropriately sized top from step 1. As shown in the Figure of 4 steps, the edges are on top of the table top and on the opposite side from the crossbrace put on in step 1.

In Step 3, I added 2x6 edges to the table tops for the side segments. The 2x6 edge will be only slight taller (~1/2 inch) than the height of the center saw box (height = 2" side + 4 " side). Note that, per standards, 2x4s and such are not the true measurements of the wood. The 2x6 edges are screwed to the edges of the side table tops.

Step 4 is the assembly of the two side tables with the saw box. The most important part of this step is to ensure that the alignment is done so that the saw top is slightly higher than the side tables by a very small amount. Basically, I put screws from the 2x6 edges into the 2x4 sides of the saw box to hold everything together. Then I added the from edge 2x4 across the length to solidify the table. The back edge will be added during final assembly.


Side table mounted to the saw box

Another view of the saw in the sawbox with side table.