Saturday, September 01, 2007

Drill Bit Holder


So I bought a big drill press today and to test it out I decided to make a holder for all of my drill bits. The construction is 3 foot long 2x4s stacked with a slight offset. I added a 'foot' on the back side to make the little half pyramid stable.

The hardest part of the whole project is drilling the holes. I used a test block to set up the depth and size on the drill bit. I also used a scrap piece of 2x4 to line up the holes from the side of the 2x4. A fan placed to blow the sawdust off of the drill press kept me drilling instead of always worrying about sawdust messing up the alignment.


Then I drilled holes... a lot of them... of different sizes and depths to match the bits I have.


I think the end product turned out nice.

Power Supply and Accessories for Teaching about Electricity


I followed the directions from this instructables how-to for "Convert an ATX Power Supply Into a Regular DC Power Supply". It was a good project to let me remember how to solder. Here's the final product:

To let this be a bit more useful for experiments to teach my daughters about electricity, I also built some jumper connectors and a light bulb fixture.

The jumper wires were made from leftover wires from the power supply and parts from Radio Shack:


The light bulb fixture is a low voltage patio lighting bulb wired up to a couple of nails on a wooden block.


The end result should allow my daughters and I experiment with what is a conductor and what is an insulator.

As noted in the original instructable, there are some dangerous components in this project. Repeat at your own risk.

Sunday, August 19, 2007

Geek Modified Media Cabinent

I am a geek. I have years worth of CDs and DVDs saved up that I burned myself or that I received in paper envelopes with computer hardware. Yes, much of the software is Linux distros. All in all, the stack of media with no cases has grown unwieldy, and though the containers that blanks come in work OK, I wanted something a bit more flashy.

And, oh by the way, I do have a lot of CDs and DVDs in my den that do have cases.

So I bought this media cabinet for a couple of dollars at a yard sale:


My idea is to add spindles to hang lots of stored CDs and DVDs on. This isn't good for stuff you use often, but that isn't what I want to store.


Step 1 is to cut some crossbeams to fit into the media center. I used 1x3 lumber. I cut it so it fit snugly into the cabinet. Test fitting it is always a good idea.


Step 2. I placed 2 CDs side by side on the board along the center line along the board and marked the center with a pencil.


Step 3. I drilled out 1/2 inch holes not quite all the way through and put in 1/2 inch dowel rods at a length chosen to not stick out from the media cabinet. Again I test fitted to make sure the piece fit properly. The dowels are glued in with Elmers wood glue.


Step 4. For my heft collection of CDs I wanted a lot of spindles, so I copied the design three more times. All copies were also test fitted. Oh, and everything was sanded, of course.


Step 5. I spray painted all of the holders, once assembled, gloss black so they would blend in with the media cabinet.


Step 6. After the holders were dry, I removed some of the shelves from the media cabinet and inserted the holders where I wanted them, using CDs to verify the spacing. I placed I single screw into each holder through the media center back. This was more than enough to hold them since they fit snug.


Step 7. I added CDs for a cool new look with lots of storage.


Sunday, August 12, 2007

Compound Miter Saw Bench Part 2: Legs and Assembly

In this segment, we build the legs, add the bottom shelf, and assemble the bench.


Step 1: build a square out of a 2x6 (top), 2x4 legs, and a 2x4 (bottom), as shown to the right:

Step 2: These legs then get screwed in between the front and back edge of the table top.

The back edge is identical to the front edge with an appropriate notch cut out for the saw overhang.

Here is a view of the legs attached to the table top:


Step 3: Two cross beams are attached from the bottom of each legs set to the leg set on the opposite side:


Step 4: Add wheels to the bottom of each leg. I used cast wheels covered in rubber from Harbor Freight.


I added 4 1x3s between the legs across the bottom to form a shelf for stacking wood. The additional weight on the bottom kept my rather narrow bench from being top heavy.

Don't forget to bolt your saw into the saw box per manufacturer's recommendations.


The Finished Product (with some of my short pieces of lumber stacked underneath):


Friday, August 10, 2007

Building a Mobile Compound Miter Saw Bench

You may remember my saw. Well this spiffy compound miter saw is wonderful to work with, but really needs to be bolted down. My workbench, however, is short and doesn't have room for wood. So, the idea here is to build a workbench for my saw with wheels.

The idea is two simple stages. First, build a table top out of 2x4s to bolt the saw to. The table top shouldn't be flat, because the level surface of the saw is higher than the surface it is bolted to. Instead of having this several inch gap, I would like to have the saw table and the table top within 1/4 inch of each other, with the saw table being slightly higher. Second, the table top needs legs with wheels and a nice setup for storage. It would be nice too, if the base could eventually accommodate dust collection.

This post is going to cover stage one. Stage two: the legs will be covered in a future post.


Building the table top takes 4 major steps. There is some finishing to be done after this that will be included in mounting it to the legs after stage 2.
Step 1, as shown above is to build 3 table segments. Just cut 2x4s to length, match them up side by side, add another 2x4 at a 90 degree angle to screw the 2x4s to, as a cross brace, and viola: a flat surface on side. I used the 4" side of the 2x4s for the table surface. It could be adapted to use the other side, if you really wanted to. Throughout this project I used 2 1/2 inch drywall screws, but a similar size screw of different types would probably work.

The result flat table segments should look like this:

TABLE TOP:


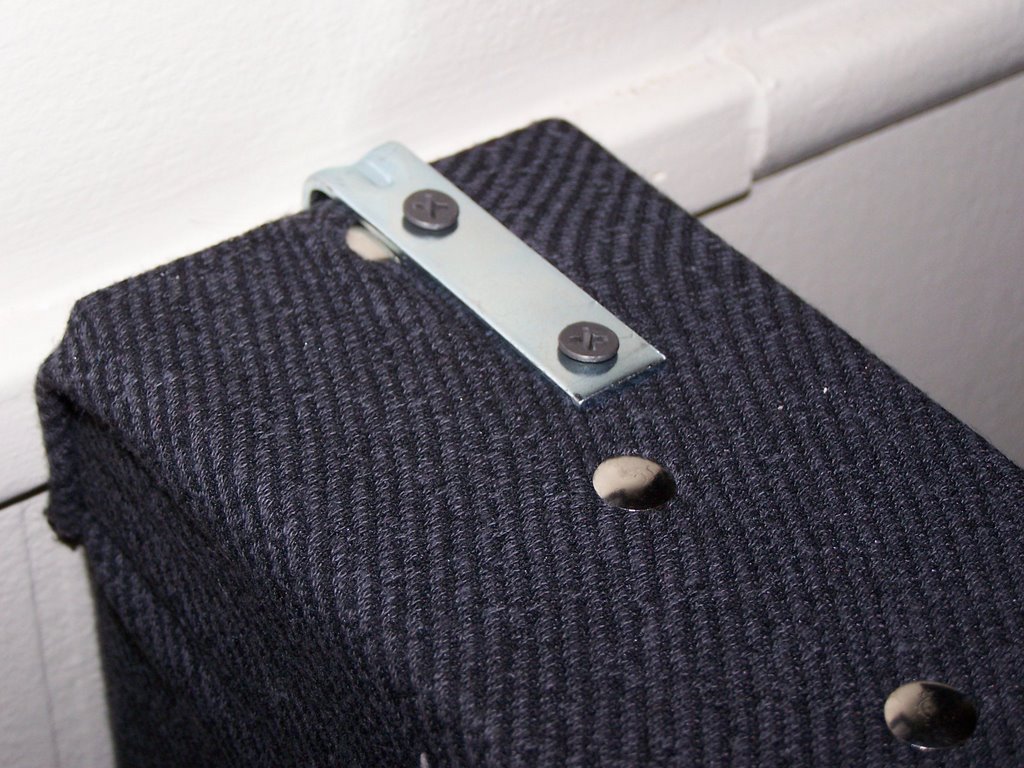
<-- Crossbrace, with screws visible


Step 2, as shown in the diagram, is to add edges to form the saw box. This is the box that the saw will sit in and bolt to. I just literally screwed 2x4s to the appropriately sized top from step 1. As shown in the Figure of 4 steps, the edges are on top of the table top and on the opposite side from the crossbrace put on in step 1.

In Step 3, I added 2x6 edges to the table tops for the side segments. The 2x6 edge will be only slight taller (~1/2 inch) than the height of the center saw box (height = 2" side + 4 " side). Note that, per standards, 2x4s and such are not the true measurements of the wood. The 2x6 edges are screwed to the edges of the side table tops.

Step 4 is the assembly of the two side tables with the saw box. The most important part of this step is to ensure that the alignment is done so that the saw top is slightly higher than the side tables by a very small amount. Basically, I put screws from the 2x6 edges into the 2x4 sides of the saw box to hold everything together. Then I added the from edge 2x4 across the length to solidify the table. The back edge will be added during final assembly.


Side table mounted to the saw box

Another view of the saw in the sawbox with side table.

Saturday, June 23, 2007

Zenwalk Linux

Zenwalk Linux is a light but useful Linux distribution related to slackware. In recent years I have tried every distro imaginable (Mandrake, RedHat, Fedora, SuSE, DSL, etc) but the only 2 that ever seem to work well are ZenWalk and SuSE. And though SuSE is great for a great many things, it is rather bulky and not the best for performance.

Zenwalk can be downloaded here.

I had to resize my Windows XP NTFS partition to make room to install ZenWalk. To do this I used the GPartEd Live CD found here.

Installation is smooth and fast.

The hard part was getting my ATI RADEON 9600 video card to work with acceleration. I had to dig around the net to find how to get it to work. The secret ultimately was that if you install the ATI proprietary drivers and they don't work, you have to uninstall them for the default driver to work with any form of accelartion. Better yet, buy an NVIDIA video card.

The default apps were plenty. I installed Eternal Lands(my latest game addiction). I also installed samba and smb4k. smb4k also installed some kde packages. It allows me to use a GUI to browse and mount windows machines on my local network. I added openoffice too.

Fast, stable, effective. Just what every user really needs.

Next I am going to play with installing StarCraft on Wine. Yum. Or maybe I should say netpkg.


Thursday, March 08, 2007

Homemade Ravioli

Our mission: to make homemade pasta. We decided to make ravioli, since they are large and seemed like an easy place to start. I browned some meat with Parmesan cheese and seasoning. Meanwhile we started on the pasta.

The recipe was easy: 4 eggs + 1 lb of flour. Hmmm... no scale, so we guestimated and ended up having to add 2 additional eggs to the mound of flour as we kneaded it.

The Mound of flour with eggs in it.

Kneading the dough.
Kneading the dough.

After kneading the dough, which took around 10-15 minutes, we then rolled the dough, and rolled the dough, and rolled the dough, and rolled the dough. What I wouldn't give for a pasta maker! And the dough was still thick. Oh well... drive on...

Rolling the dough.
Rolling the dough.Rolling the dough.
Using my biscuit-making know-how, we chose a glass to mark round ravioli halves.


Marking circular halves.

I cut the halves out with a knife. We then stuffed them full of the seasoned meat and pinched the edges shut.

Cutting out the halves.


Filling the ravioli.
Pinching the ravioli shut.

Voila. Ravioli.
After getting our 24 ravioli made, I cooked them in hot boiling water until al dente. We also cleaned up the counter.
Cleaning.

Cleaning.
The finished product.

Overall, the pasta was pretty good. It tasted like regular past. It was too thick -- a pasta maker would have helped with that. The meat wasn't seasoned quite right. Overall though, it was a cool project.

Special thanks to my 4 daughters and my wonderful wife for helping with this latest family project on our Thursday creative cooking night.

Sunday, March 04, 2007

Sump Pump Adventures


So in the corner of the new house, under a built-in cabinet is a sump pit with a old sump pump. Unfortuntately a couple of times it has stuck, though it never seems to leak any water into the house. Still, paranoia reigns supreme, and so I want to replace the pump.

Of course, just replacing it would be too easy. I want a backup pump that will run on battery power in case the A/C power goes out. This, of course, is just shy of my dream of having a full backup generator for the whole house.

So first I procured a backup pump and a new sump pump. I also bought a bunch of pipe and fittings for installation. My sump pit is about 26 1/4 " to the top of the 1 1/2" output pipe. It is about 15" across.

The diagram on the right was on the back of the backup sump pump box. Basically it shows having the two pumps connected at different levels with one-way valves. It looks easy, but that sump pit shown there is about 8 times the size of mine. This is going to be a bit of a crunch.


Installation of a sump pump requires a one-way valve on each pump. I install the one way valves on each. To save space, I run both pipes straight up, and use a U-shaped pipe to connect the backup pump to the larger pump. They also get clamped together.

A key to whole process is to cut each pipe segment straight and to use the two stage PVC glue system properly. You should glue both the inside and outside of the adjoining pipes and give them a turn per the glue directions to seal them. Cutting can be done quickly and easily using a handheld power jigsaw. Alternately, a hacksaw can be used.


The final assembly required the old sump to be cut off at the pipe. The new unit slipped into place and was glued. Make sure you test both pumps with water in the sump pit. Running the pumps dry can ruin them.


As of the posting of this, the unit has been in place for over 6 months without a problem.

Sunday, February 11, 2007

Homemade Cubicle Walls

Love those cubicle walls you have at work? Want to bring the gray boredom home to your office area? Well, here's a quick how-to on making your own cubicle walls...

Summary of Construction
  1. Collect your materials and tools.
  2. Construct your frames
  3. Attach fabric to your frames.
  4. Mount walls
  5. Add molding
Collect your Materials and Tools
  • Saw (Miter saw preferred, or a hand saw) (see pic)
  • Hammer
  • Power Drill / Power Screwdriver
  • 2 1/2 inch wood screws
  • 1 inch wood screws
  • Thumb Tacks
  • 2x4 lumber
  • Fabric
  • Moulding
  • Corner L-brackets
  • Mending plates
  • 1 inch finishing nails
For this project, you need some basic tools (hammer, saw, power screwdriver). For screws, I chose to use drywall screws, since I find they are useful for lots of things around the house anyway. Fabric should be chosen so it can stretch (you'll be stretching it by hand) and so it gives the desired opaqueness and fire resistance. I used standard metal thumbtacks since you can push them in and still tap them tight with a hammer.

Construct the Frames
I built 2x4 frames with simple screwed butt joint. I predrilled the top and bottoms to put the screws through into the sides. I decided against cross braces, since the walls I built were no larger than 5' by 5 1/2' and seemed sturdy enough to be freestanding. Predrilling keeps the wood from splitting. As with most projects, choosing your lumber to be straight with no large warps or twists makes everything easier. In general, the frame should be built so the width of the frame plus the thickness of the frame is no wider than the fabric.

Fig 1. A Butt Joint. The two screws were put through predrilled holes in the top to attach it to the frame side

Attach the Fabric
We attached the fabric at the bottom using tacks, making sure it was straight and pulled tight. We then wrapped it around to cover one side, pulling it tight and tacking it to the top. In all cases I use about one tack every 3 to 6 inches. We then pulled it tight to the bottom, covering the other side, and tacked it into place. I tapped the tacks in with a hammer to ensure they were good and tight. After the fabric was cut (about 1/2 inch beyond the tacks), we tacked the sides, pulling tight and making sure there were no wrinkles. Having a stretch fabric keeps from having a trouble with the fabric drooping on the frame. All tacking is done as to allow cuts and tacks to be hidden by the molding.


Fig. 2 Tacks holding the fabric in place.


Fig 3. The corners are wrapped similar to wrapping paper.

Mount the Wall
Similar to the way cubicle walls are attached, I used L-brackets to attached the fabricated walls to my permanent walls using 1 inch drywall screws. On top, the L-brackets were positioned to be hidden by the molding.Fig. 4. An L-Bracket holding a wall in place. It will be covered by the molding.

Adjacent sections can be attached to each other using mending plates.


Fig. 5. Another look at the wall held in place.

Add the Molding
The molding is cut with beveled cuts and nailed over seams and tacks.

Fig. 6. Finished Product.


Fig. 7. Finished Product.


Fig. 8. Finished Product.