Monday, April 06, 2015
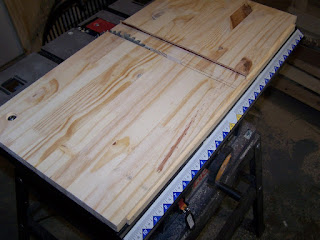
New Shelves
Friday, October 24, 2014
Restore Fire Pit
We went over to the local Habitat for Humanity Restore today where they sell donated building supplies. There we found some leftover block for 25 cents a piece. So for $4 we got enough block to build a small fire pit big enough to roast a few hot dogs and marshmallows. Veronica and Sarah dug out the grass and assembled it. Tomorrow night the girls are going to try it out.
Sunday, September 07, 2014
WOW!! How Big a Two-Car Garage Is
Saturday, September 06, 2014
Reused Lumber Cart
Storing lumber takes a lot of space. Moving lumber can be a pain, especially full sheets of plywood. For a small investment in four casters and some screws, my daughter's built a wood storage cart under my direction out of reused lumber. Some old wooden swingset pieces make up most of the cart. The build used some extra wooden braces and toe screws to sturdy it. One side is 6 feet long and open for large pieces. The other side has bracing on the ends so it is suitable for smaller length pieces which can be sturdied with a couple of bungee cords.
Monday, April 29, 2013
Sarah's Heater Shield Project
Sunday, March 31, 2013
Dice Popper Prototype
Eventually I am planning a 7 module version with a full set of polygonal dice for Pathfinder.
Bandsaw Reindeer: Rough Cut
Saturday, March 30, 2013
Dollar Store Birdhouse Condo
Tying them all together was a bit of a chore, but Sarah helped me with that.
And here's the finished product:
Friday, March 29, 2013
Band Saw Project Number 1
This was the project I saw on a Lowes Creative Ideas email:
And this was my version:
Sunday, April 11, 2010
Tillandsia Pot
New Woodworking Jig for Making Chessboards
Saturday, January 23, 2010
First Wood Carving
I have a lot to learn and it will be fun learning along the way.


Desktop Terrarium Project
 This was a really inexpensive project for dressing up my desk through the dreary winter.
- Colored stones from dollar store
- Air tight glass jar for $5 on clearance at local hobby store
- Potting soil
- Plants (These were perennial hen and chicks that I had to dig out from under a snow bank)
- Washed out the jar with water.
- Washed the plants with a little water since they were bare root. Left them damp.
- Placed stones around the outside of the jar in a colored pattern.
- Added a layer of potting mix.
- Placed more stones around the outside of the jar.
- Added more potting mix.
- Wet the potting mix until water was visible around the stones.
- Added plants, patted them into place.
- Placed the jar in a sunny spot.


