
The recipe was easy: 4 eggs + 1 lb of flour. Hmmm... no scale, so we guestimated and ended up having to add 2 additional eggs to the mound of flour as we kneaded it.
The Mound of flour with eggs in it.

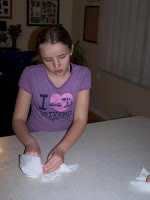
Kneading the dough.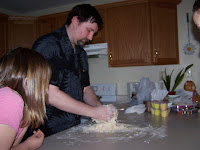
Kneading the dough.

After kneading the dough, which took around 10-15 minutes, we then rolled the dough, and rolled the dough, and rolled the dough, and rolled the dough. What I wouldn't give for a pasta maker! And the dough was still thick. Oh well... drive on...
Rolling the dough.
 Rolling the dough.
 Rolling the dough.
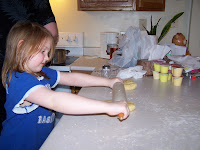
Using my biscuit-making know-how, we chose a glass to mark round ravioli halves.
Marking circular halves.

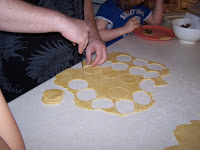
I cut the halves out with a knife. We then stuffed them full of the seasoned meat and pinched the edges shut.
Cutting out the halves.
Filling the ravioli.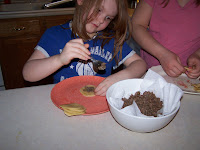
Pinching the ravioli shut.
Cleaning.
Cleaning.
The finished product.

Overall, the pasta was pretty good. It tasted like regular past. It was too thick -- a pasta maker would have helped with that. The meat wasn't seasoned quite right. Overall though, it was a cool project.
Special thanks to my 4 daughters and my wonderful wife for helping with this latest family project on our Thursday creative cooking night.

Kneading the dough.

After kneading the dough, which took around 10-15 minutes, we then rolled the dough, and rolled the dough, and rolled the dough, and rolled the dough. What I wouldn't give for a pasta maker! And the dough was still thick. Oh well... drive on...
Rolling the dough.
 Rolling the dough.
 Rolling the dough.

I cut the halves out with a knife. We then stuffed them full of the seasoned meat and pinched the edges shut.

Filling the ravioli.

Pinching the ravioli shut.

Voila. Ravioli.
After getting our 24 ravioli made, I cooked them in hot boiling water until al dente. We also cleaned up the counter.

Cleaning.

The finished product.

Overall, the pasta was pretty good. It tasted like regular past. It was too thick -- a pasta maker would have helped with that. The meat wasn't seasoned quite right. Overall though, it was a cool project.
Special thanks to my 4 daughters and my wonderful wife for helping with this latest family project on our Thursday creative cooking night.


